Imagine getting to any of the Disney Parks and not having to worry about an additional card for your park ticket because it’s right in your iPhone. This pass let’s get into the park, charge to your room, and redeem your lightning lane without anything else. The simplicity of carrying everything on one device, that you always have on you anyway, may let you focus more on the experience.
Introducing Disney MagicMobile
Disney MagicMobile is in the My Disney Experience app that lets you add your park pass to Apple Wallet. Once you link it, your iPhone or Apple Watch acts like a “MagicBand,” giving the
same contactless entry to rides, Lightning Lane picks, and payment options, everything from a single device you already love.
A tap syncs the ticket info, turning your phone into an all‑in‑one key to Disney World. Some guests might wonder if relying on one device is safe, if the battery dies. That concern is valid, but you can charge the device or keep a backup card.
This short guide aims to walk you step‑by‑step through adding your Disney Pass to Apple Wallet, hoping to make your visit smoother, more convenient, and, most of all, more magical, and truly unforgettable experience.
What You’ll Need Before You Start
- Essential App: My Disney Experience app (latest version installed).
- Disney Account: A valid Disney account with your park tickets, passes, or Disney Resort hotel reservation already linked.
- Apple Device: An eligible iPhone with the latest version of iOS or an Apple Watch with the latest watchOS.
- Apple ID Security: Ensure you are signed into iCloud with two-factor authentication enabled.
First, you should have the My Disney Experience app on your phone. If you don’t have it, you’ll probably need to download it from the App Store. Make sure it’s the newest version, because the app does most of the work when you try to put the pass into Apple Wallet.
Next, you must have a Disney account that holds your tickets, passes, or a hotel reservation. Without a real account, the pass won’t show up in Wallet. Also, your Apple device needs to be able to run Wallet. That means an iPhone or Apple Watch that supports the feature, and it may be running the latest iOS or watchOS. If your phone is too old, or the software is out of date, you may not add the pass. So, check the app, the account, and the device before you start the transfer, and make sure everything syncs.
Step-by-Step Guide: Adding Your Pass to Apple Wallet
First, you need the My Disney Experience app on your iPhone. Make sure it’s downloaded from the App Store and that you’re signed into your Disney account, this step is essential for the transfer.
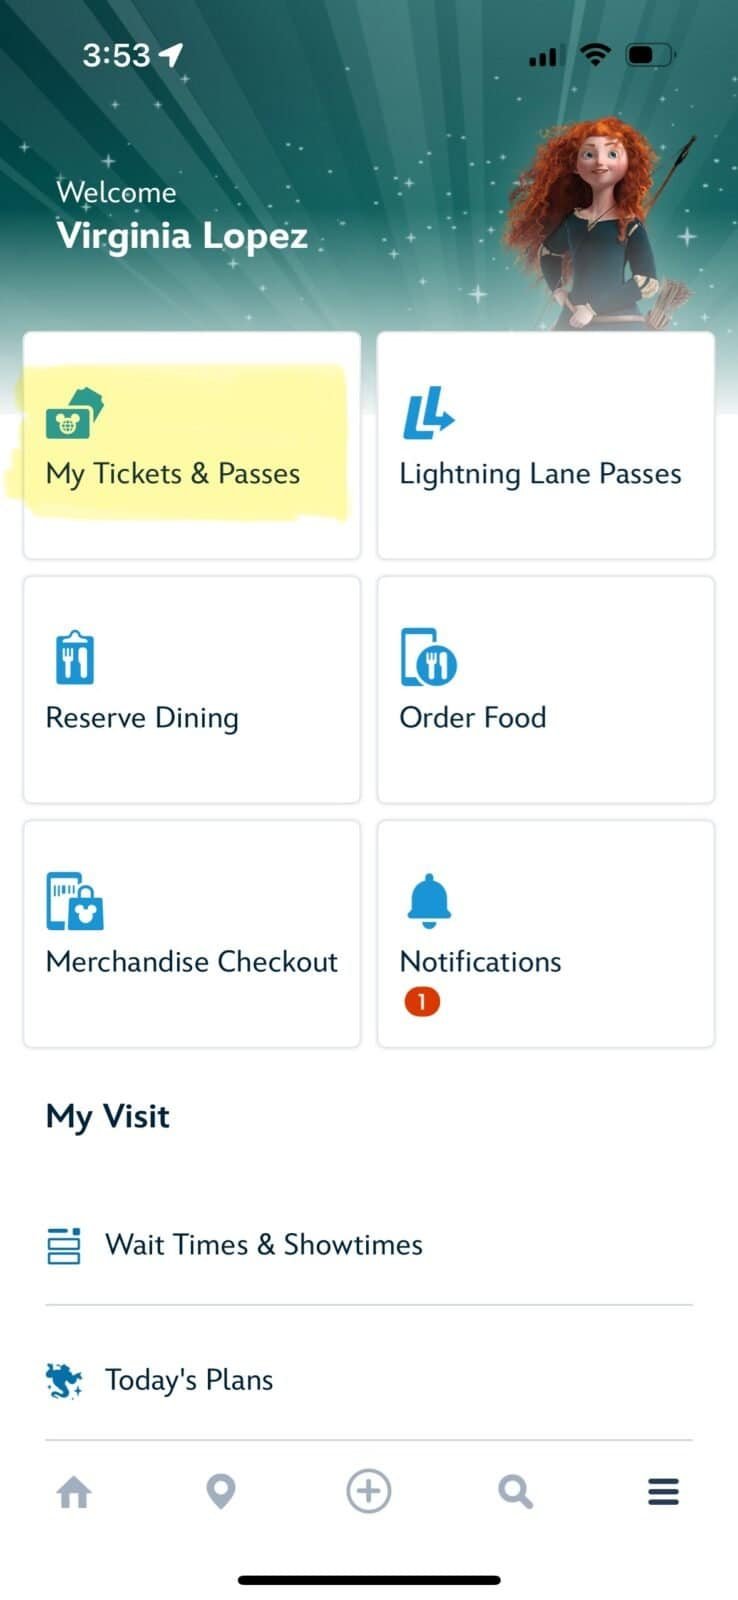
Then, look for the little menu icon: three horizontal lines near the bottom right corner. Tap it; a list slides out.

From that list choose “My Tickets & Passes.”
Select your pass and select “Save to Wallet.”
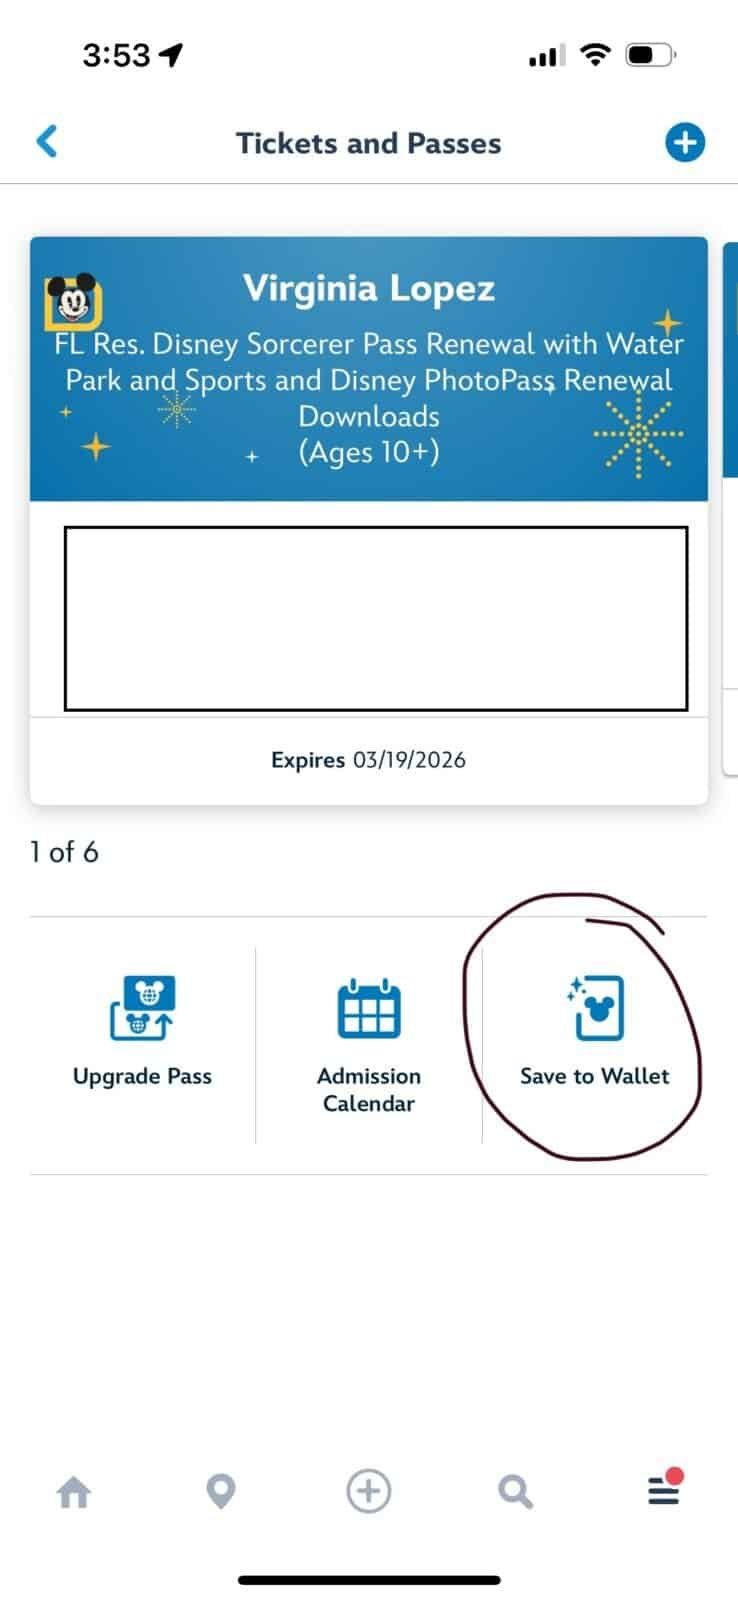
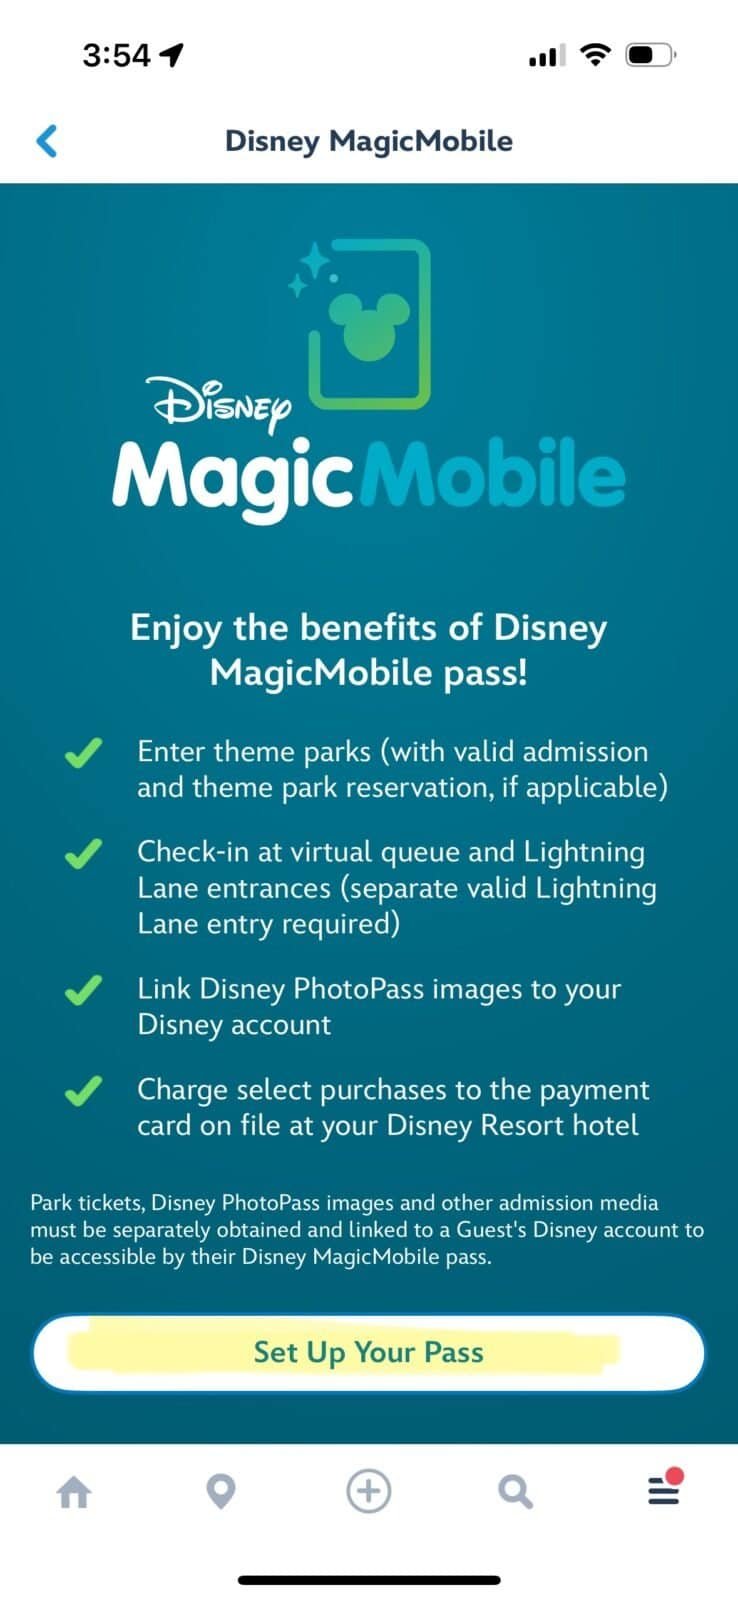
At the bottom of the page, in a white button, you will see Set Up Your Pass. Select that.
Here’s the fun part! You get to choose a design for your digital pass, there are so many options. I use the Disney Vacation Club design.
Select Add to Apple Wallet
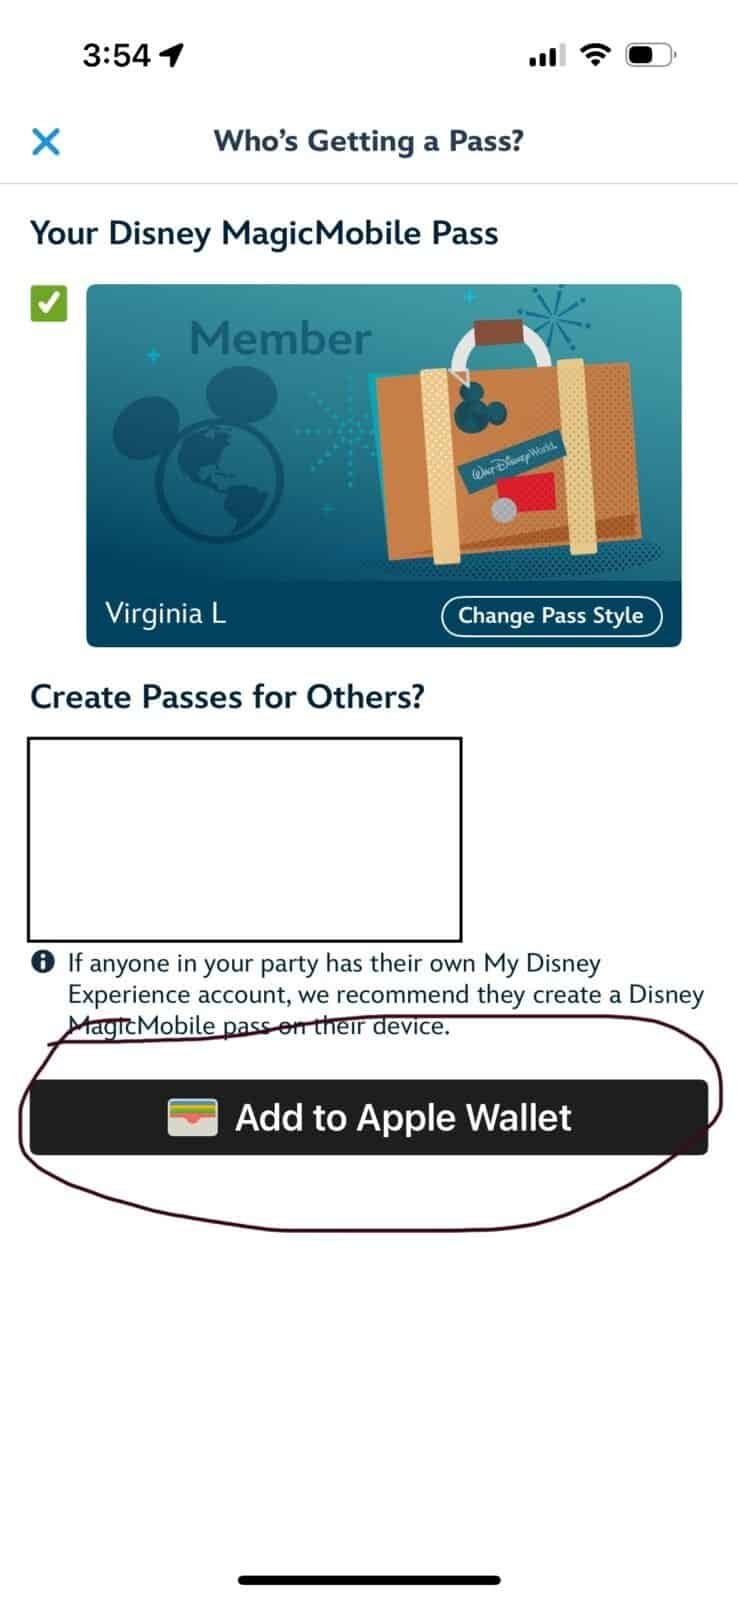
It might take a few minutes but it will load to your wallet, just leave the phone alone while it does so.
High level Step by Step List
- Open the My Disney Experience App
- Select the Menu Icon and Navigate to My Tickets & Passes
- Select your Pass
- Select Save to Wallet
- Select Set Up Your Pass
- Customize Your Pass (Optional but Fun!). Choose a design
- Add to Apple Wallet
Express Mode Explained – Express Mode is automatically enabled, meaning you don’t have to unlock your device to use the pass. It allows you to use your pass at park touchpoints without needing to wake or unlock your iPhone or Apple Watch.
At the Park Entrance – Simply hold the top of your iPhone or the face of your Apple Watch near the touchpoint.
Lightning Lane entry – Tap your phone at a Lightning Lane turnstile. The system checks if you’re allowed and will turn green
Linking Disney PhotoPass shots – When a Disney photographer takes a picture, the kiosk uses your phone to read your pass and attaches the photo automatically to your account.
Charging to your Disney hotel room – Shops and restaurants can charge your purchase straight to the room, and therefore card, you’ve pre‑linked. Just tap the pass, and the bill goes onto the room’s folio – no cash or credit card needed.
These extras show how Apple Wallet can turn one digital card into a whole toolbox. It piles entry, ride reservations, photo linking and payment into one spot, making the park feel smoother. Some might worry about data privacy – after all, everything lives on a single device – but Disney says they keep the info encrypted and safe.
Frequently Asked Questions (FAQ) / Troubleshooting
What if I have an Android? You may find the steps for Google Wallet pretty much alike.
Can I still use my MagicBand or card? Yes, this is just another option.
What if my phone battery dies? When your phone battery dies, an iPhone set to Express Mode could still be used.
What if I lose my phone? Head over to Guest Relations. They likely will deactivate the phone as a pass and give you another way to get into the park.
Using Apple Wallet at Walt Disney World feels pretty smooth and may boost the fun of visiting. It puts park entry, ride bookings, and payment options all together, so guests can move around with less hassle. Some people worry about data privacy, yet Disney says the info stays protected. If you don’t own an iPhone, Android owners can use Google Wallet for a alike experience. For those still attached to a MagicBand, that choice is still there. Overall, Apple Wallet at Disney World could be seen as a magical convenience, even if a few doubts stay. Therefore, many visitors report feeling more relaxed overall.